|
|
|
|
|
|
|
|
|
|
|
|
|
|
|
|
|
|
|
|
|
|
|
|
|
|
|
|
|
|
|
|
|
|
|
|
|
|
 |
 |
|
|
|
 |
 |
 |
| A Shortened Shifter for |
| Manual Fiero Transaxles |
 |
|
|
 |
 |
 |
 |
 |
 |
|
|
|
 |
 |
 |
| Difficulty: On a scale of 1 to 10, about a 3 (easy) |
| Special Tools: Electric Welder |
| Time Required: About two hours |
 |
|
|
 |
 |
 |
|
|
|
 |
 |
 |
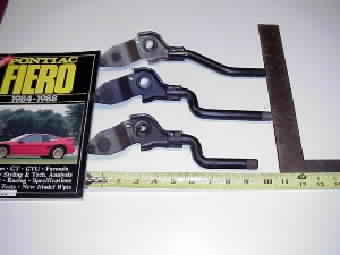
| The stock shifter for the manual transaxle on the Pontiac Fiero was produced in three different styles. In the photo below, from the top down, are shifters from '84, '85 and '87 cars. All shifters are interchangable, but each has a unique angle and length. For most drivers, the 1984 shifter is prefered because of the shorter stock length. |
 |
|
|
 |
 |
 |
 |
 |
 |
 |
 |
 |
 |
 |
 |
 |
 |
|
 |
 |
 |
 |
 |
 |
 |
 |
 |
 |
 |
|
|
|
 |
 |
 |
| This project provides one way to shorten any of the above stock shifters to reduce the "rowboat" feel many owners complain about when changing gears on the Fiero. Interior apperance is also improved. Moving the shifter into reverse will require more effort, but throw distance will be considerable reduced. A more comfortable hand position when shifting will also be accomplished. In this sample project, we will shorten the shifter from an '84 car. The '85 is similar. The "dog leg" style shifter used on '87 and '88 cars will retain a slight forward angle when shortened. |
|
| Step one is to remove the shift console. This requires lifting out the ash trays, removing the four 7mm screws under the ash trays, unscrewing the shift knob and then lifting the shift surround off. |
|
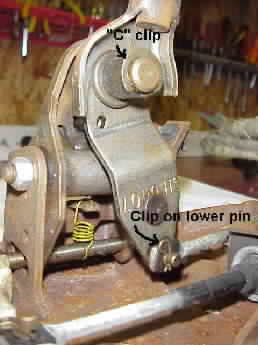
| The shifter is removed by "popping" off the C clip on the fulcrum shaft with a small screwdriver - careful not to loose it! You then disconnect the gear selection cable by removing the clip on the end of the small shaft with long nose pliers. On cars with a 4-speed you may also have to remove the back-up light switch to slide the shifter off. |
 |
|
|
 |
 |
 |
 |
 |
 |
 |
 |
 |
 |
 |
 |
 |
 |
 |
|
 |
 |
 |
 |
 |
 |
 |
 |
|
|
|
 |
 |
 |
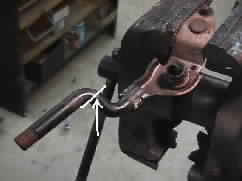
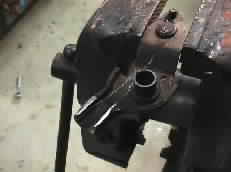
| Take the entire shifter assembly to your workbench and place it in a vice as shown below. Using a hack saw cut the shifter at the point identified by the white line in the photo. Note on the '84 rod that the cut is made vertical to the bend, not across. This gives a little extra necessary length to this shorter stock shifter. |
 |
|
|
 |
 |
 |
 |
 |
 |
 |
 |
 |
 |
 |
 |
 |
 |
 |
|
 |
 |
 |
 |
 |
 |
 |
|
|
|
 |
 |
 |
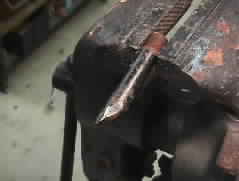
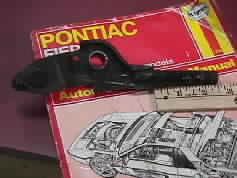
| The above photo on the right shows the "stump" you will have after cutting the rod. This is the part you will reuse. |
|
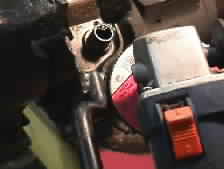
| Using a small grinder with an abrasive wheel, carefull cut away all of the original factory weld from the remaining base of the rod. You may need to use a metal chisel to open the base and remove the rod so you have a base that looks like the one on the lower right. |
 |
|
|
 |
 |
 |
 |
 |
 |
 |
 |
 |
 |
 |
 |
 |
 |
 |
 |
 |
|
|
 |
|
|
|
 |
 |
 |
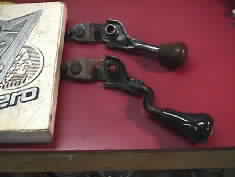
| The previously created "stump" is repositioned into the base and welded with an electric welder just like the original weld you removed earlier. The two lower photos show the reassembled shifter. The one on the right is contrasted to the original. |
 |
|
|
 |
 |
 |
 |
 |
 |
 |
 |
 |
 |
 |
 |
 |
 |
 |
 |
|
|
 |
 |
 |
 |
|
|
|
 |
 |
 |
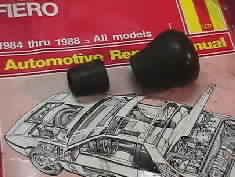
| While it is not necessary, some drivers may want to saw the bottom of the original shifter knob off some to give more clearance over the shift boot. I would NOT advise doing this on a leather covered knob - only the plastic surface ones. A hack saw works just fine here. Some 400 grit sandpaper is used to smooth the edges of the cut. |
 |
|
|
 |
 |
 |
 |
 |
 |
 |
 |
 |
 |
 |
 |
 |
 |
 |
 |
 |
 |
 |
 |
|
|
|
 |
 |
 |
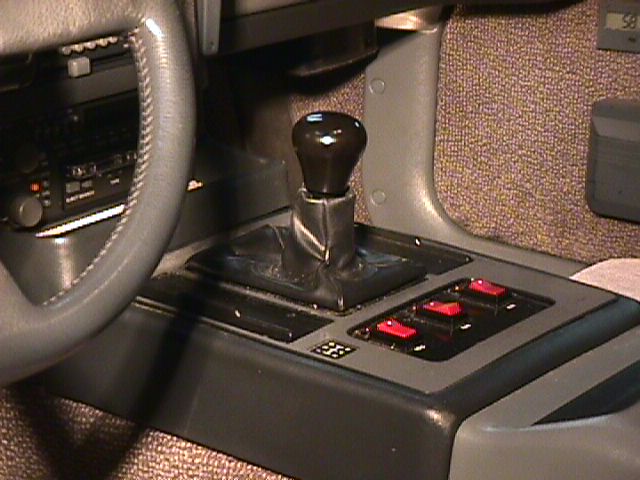
| The entire assembly is then painted and reassembled. Be sure to lube the fulcrum shaft. The stock shift boot is folded in at the top to reduce height. The photo below shows how the completed project looks. Neat, isn't it? Gives that true sports car look and feel. |
 |
|
 |
 |
 |
 |
 |
 |
 |
 |
 |
 |
 |
|
|
 |
 |
 |
 |
 |
 |
 |
 |
 |
 |
 |
 |
 |
|
 |
 |
 |
 |
 |
|
|
|
 |
 |
 |
| If you feel that the project is a little more than you want to undertake, modified shifters are available from the FieroZone. The price is $35 (includes shipping in USA) upon receipt of a useable core. If you wish, you may purchase a completed shifter outright for $65 (shipping included). If your old shifter is returned within 30 days, you will be refunded the $30 core charge. Orders may be placed by first calling Randy Agee at 804-779-1099, fax to 804-779-7550, or e-mail to ragee@erols.com to confirm shifter availability. Payment and cores should be mailed to Randy Agee, 5046 Sandy Valley Rd., Mechanicsville, VA 23111 |
|
| Article and contents copyright Randy T. Agee, April 2000 |
| Please contact the author for permission to reprint or circulate. |
|
| Thanks! |
|
 |
|
|
 |
 |
 |
 |
 |
 |
 |
 |
 |
 |
 |
 |
 |
 |
 |
 |
|


